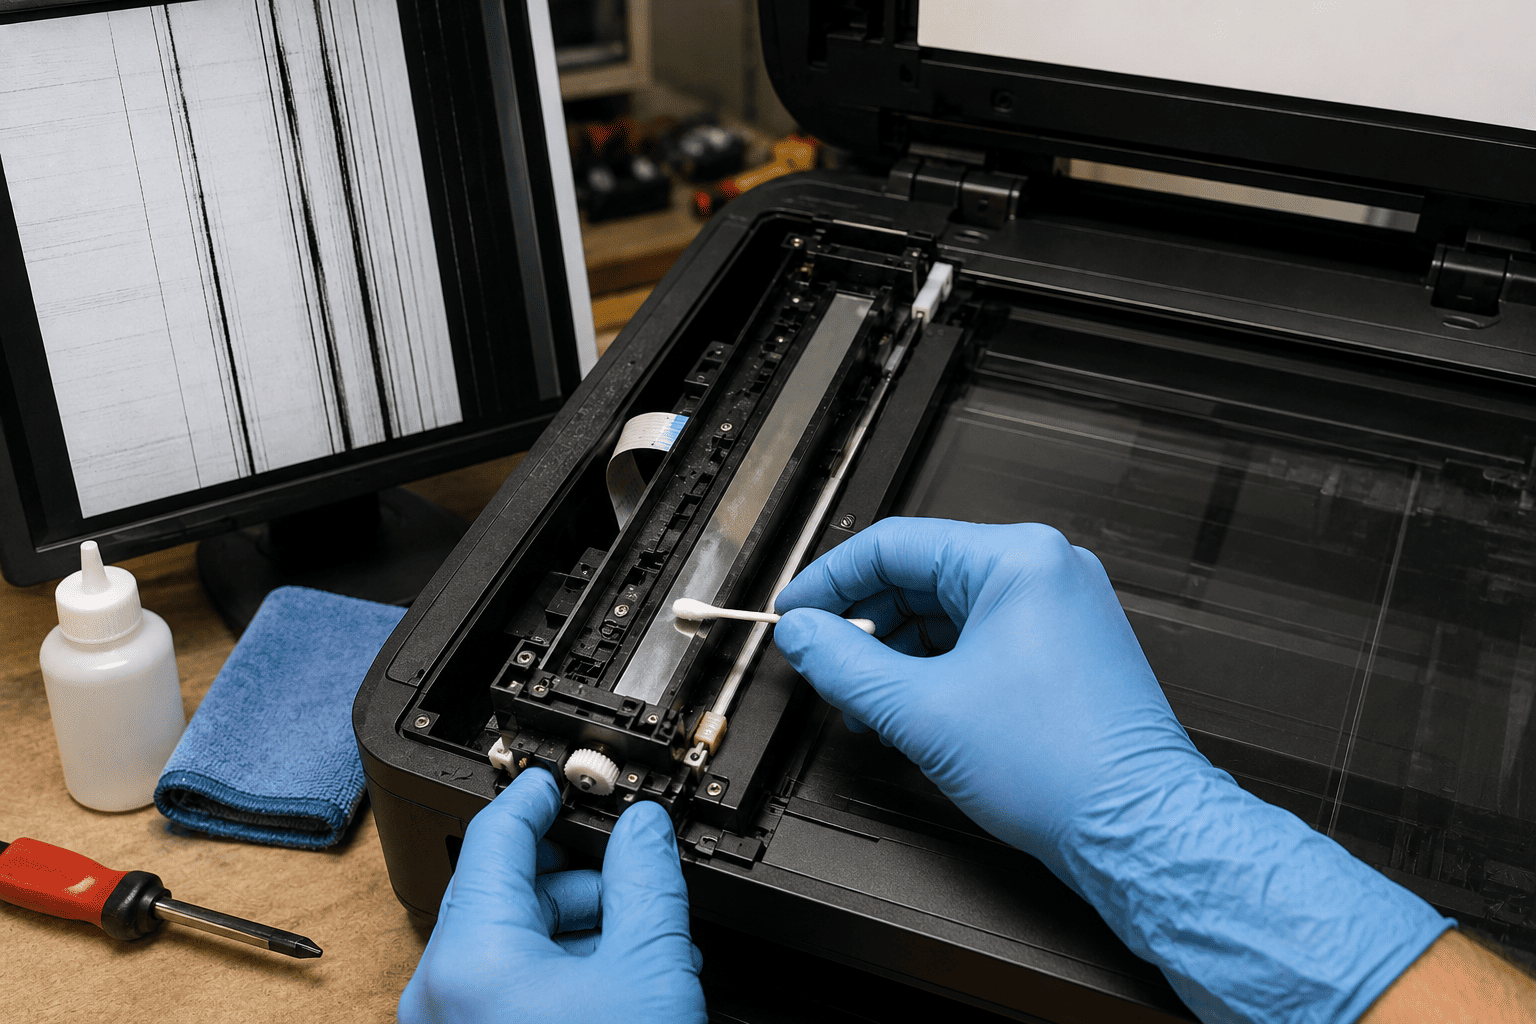
A scanner that produces black lines, dark streaks, or vertical marks across scanned documents may have a dirty scanner glass, contaminated mirrors, dust inside the optical path, or a CCD calibration problem.
In multifunction printers and dedicated scanners, the imaging system needs a clean optical path and accurate calibration to produce a clear scan. If cleaning the glass does not solve the problem, the scanner's mirrors, CCD/CIS assembly, calibration area, or related components may require inspection.
Problem
The customer reports that scanned documents contain one or more black or dark vertical lines, even though the original document is clean.
The printer may print normally while scans and copies show the defect, which can help identify the scanner's optical system as the likely source.
What Problem Is the Customer Facing?
Customers may experience:
- Black vertical lines on scanned documents
- Dark streaks on copies
- One consistent line appearing on every scan
- Gray or dark bands across scanned pages
- Scan quality suddenly becoming worse
- Lines appearing even with clean originals
- ADF scans showing lines while flatbed scans look normal
- Flatbed scans showing lines while ADF scans are clean
- Scanner produces uneven brightness
- Scanned images have repeated marks in the same location
- Copy quality is poor even though printing is normal
- Scanner produces distorted or dark areas
Root Causes of the Problem
1. Dirty Scanner Glass
Dust, ink, correction fluid, fingerprints, or other residue on the scanner glass can appear as lines or marks on scanned documents.
2. Contaminated ADF Glass Strip
Many multifunction printers have a narrow strip of glass used when documents are scanned through the Automatic Document Feeder.
A small mark on this strip can create a line running through every ADF scan.
3. Dirty Scanner Mirrors
In scanners that use a CCD optical system, internal mirrors direct light toward the imaging sensor.
Dust or contamination on these components can reduce image quality or create dark areas and streaks.
4. Dust in the Optical Path
Dust inside the scanner's optical assembly can interfere with light reaching the CCD or related imaging components.
5. CCD Calibration Problem
A CCD scanner uses calibration data to correctly interpret the light reflected from the document.
If calibration is incorrect or the reference area is contaminated, the scanner may produce uneven output or lines.
6. Dirty Calibration Reference Area
Many scanners use a white reference strip or calibration area to establish a baseline for the scanning system.
Dirt or contamination in this area can affect calibration.
7. Damaged CCD Assembly
If cleaning and calibration do not resolve the problem, the CCD or related optical components may be damaged.
8. CIS Sensor Problem
Some scanners use a CIS sensor rather than a traditional CCD optical system.
A defective CIS assembly can produce similar scan-quality problems and requires model-specific diagnosis.
9. ADF Roller or Document Path Contamination
If the problem occurs only when using the ADF, contamination along the document path or ADF glass can be responsible.
10. Scanner Calibration or Firmware Issue
In some models, calibration procedures or firmware-related problems can contribute to scan-quality defects.
How Can Customers Identify the Issue?
Look for:
- A black line appears on every scanned page
- The line is always in the same position
- Copies show the same line
- The printer's normal print output is clean
- ADF scans have lines but flatbed scans do not
- Flatbed scans also contain the line
- Cleaning the main scanner glass does not fix the problem
- Dark streaks appear across scanned documents
- Scan brightness is inconsistent
- The problem started after a spill or dirty document
- The scanner has not been serviced or cleaned for a long time
- Scan quality becomes worse after repeated use
- Possible Solutions
1. Determine Whether the Problem Is From the ADF or Flatbed
Start by performing two tests:
- Scan a clean document directly from the flatbed glass.
- Scan the same document using the ADF.
If the line appears only during ADF scanning, the ADF glass strip or document-feed optical path should be inspected first.
2. Clean the Main Scanner Glass
Power the scanner down according to the manufacturer's instructions and carefully clean the scanner glass with an appropriate lint-free cloth and suitable glass-cleaning procedure.
Remove:
- Fingerprints
- Dust
- Ink residue
- Adhesive
- Correction-fluid residue
Avoid spraying liquid directly into the scanner.
3. Clean the ADF Glass Strip
If lines appear only when scanning through the ADF, inspect the narrow glass strip.
Even a tiny speck of dirt can create a long line across the scanned image.
Clean the strip carefully and test the scanner again.
4. Inspect the White Calibration Area
Check the scanner's white reference area for:
- Dust
- Ink
- Paper residue
- Scratches
- Stains
A contaminated reference area can affect the scanner's calibration.
5. Inspect the Scanner Optical Path
If external glass cleaning does not solve the issue, a technician can inspect the internal optical system.
Depending on the scanner design, this may include:
- Mirrors
- Lenses
- CCD assembly
- CIS assembly
- Light source
- Optical carriage
- Calibration components
6. Clean the Scanner Mirrors
For scanners that use a CCD optical system, contaminated mirrors may require careful cleaning.
The optical assembly is delicate, so technicians should use appropriate cleaning materials and avoid scratching or touching sensitive optical surfaces unnecessarily.
7. Perform CCD Calibration
After cleaning or servicing the optical system, the scanner may require a calibration procedure.
Depending on the printer or scanner model, calibration may be performed through:
- Service mode
- Printer control panel
- Manufacturer utility
- Diagnostic software
- Scanner calibration procedure
The exact process should follow the manufacturer's service documentation.
8. Check the CCD or CIS Assembly
If calibration does not correct the problem, test the imaging sensor.
A technician can determine whether the problem is caused by:
- CCD failure
- CIS failure
- Sensor connection
- Optical alignment
- Light source
- Scanner control electronics
9. Check Scanner Carriage Movement
The scanner carriage must move smoothly and maintain the correct distance from the document.
Inspect for:
- Obstructions
- Dirty guide rails
- Mechanical damage
- Unusual noise
- Uneven movement
- Loose components
10. Check the Scanner Cable and Connections
A loose or damaged connection between the imaging assembly and control board can cause scan-quality problems.
Inspect the relevant:
- Flat-flex cables
- Connectors
- Harnesses
- Sensor connections
11. Update Firmware When Appropriate
If the manufacturer provides a firmware update addressing scanner or imaging problems, update the printer according to the manufacturer's instructions.
Use firmware intended for the exact model.
12. Test After Cleaning and Calibration
After completing the repair:
- Scan a clean white page
- Scan a text document
- Test the flatbed
- Test the ADF
- Make a copy
- Check whether the line remains in the same position
- Compare scan quality at different resolutions
The final test should confirm that the black line has been eliminated.
Why Choose Guru Computer Solution?
1. Experienced Technicians
Our technicians can diagnose scanner glass, ADF, CCD, CIS, calibration, and optical-system problems.
2. Professional Scanner Cleaning
We carefully clean scanner glass, ADF glass strips, optical paths, and other accessible components without unnecessary damage.
3. CCD Calibration Support
When cleaning alone is not enough, we can inspect calibration-related problems and perform appropriate model-specific procedures.
4. Optical System Diagnosis
We can inspect mirrors, imaging sensors, cables, and scanner mechanisms to determine the actual cause of repeated black lines.
5. Suitable Replacement Parts
If the CCD, CIS, optical assembly, or another component is defective, we can identify the appropriate replacement for the printer model.
6. Affordable Repair
We diagnose the actual source of the scan-quality problem before recommending expensive scanner or multifunction printer replacement.